TestGen lets you insert tables into testbank and test questions—in instructions, questions, answers, explanations, and comments—as well as in page headings. To insert a table, put the cursor in an edit field and select "Table > Insert" from the Insert menu. This opens a dialog in which you can set up the table dimensions, height and width, borders and shading, and alignment.
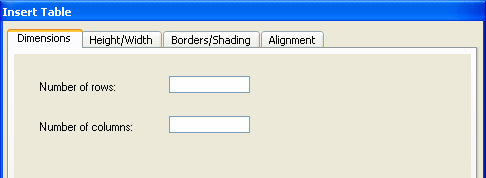
Dimensions Click the Dimensions tab and enter the number of rows and columns you want for the table.
Height and Width Click the Height/Width tab and enter the minimum row height, column width, and cell padding in inches. Enter fractional widths as decimals. Height and width settings apply to all the rows and columns in the table. Table row height increases automatically when you add text that exceeds the height of the cell, but the height will never be less than the minimum row height you specify.
Cell padding adds space evenly to all four sides inside each cell to prevent text from printing too close to the cell border lines.
Borders and Shading Click the Borders/Shading tab to select line color, pattern, and weight for table borders. You can also select fill color, pattern, and line weight for table cells.
When you insert a table, the borders and shading settings apply to all the cells in the table.
Alignment Click the Alignment tab to set the vertical and horizontal alignment for individual table cells. Settings apply to all the cells in the table when you insert it, but you can make additional adjustments to selected cells, rows, and columns after the table is inserted using the Modify Table dialog or the justification buttons on the ruler.
To modify a table you previously inserted, select one or more cells, rows, or columns in the table. Select "Table > Modify" from the Insert menu. When the Modify Table dialog opens, click any of the tabs and change the settings for the selected parts of the table. Click OK or Apply to see the results.
To delete rows or columns from a table, or the delete an entire table, select the rows or columns, and then select "Table > Delete Cells" from the Insert menu. Make your selections and click OK or Apply to see the results.
To add one or more rows or columns to a table, put the cursor in the cell above or below where you want to add. Then select "Table > Insert Cells" from the Insert menu. Make selections on the dialog to indicate how many and where rows or columns should be inserted. Click OK or Apply to see the results.
Tables must reside in their own vertical space; in other words, you cannot type text on the same line as a table, outside of a table cell. However, you can align tables flush left, centered, or flush right using the justification buttons on the toolbar.